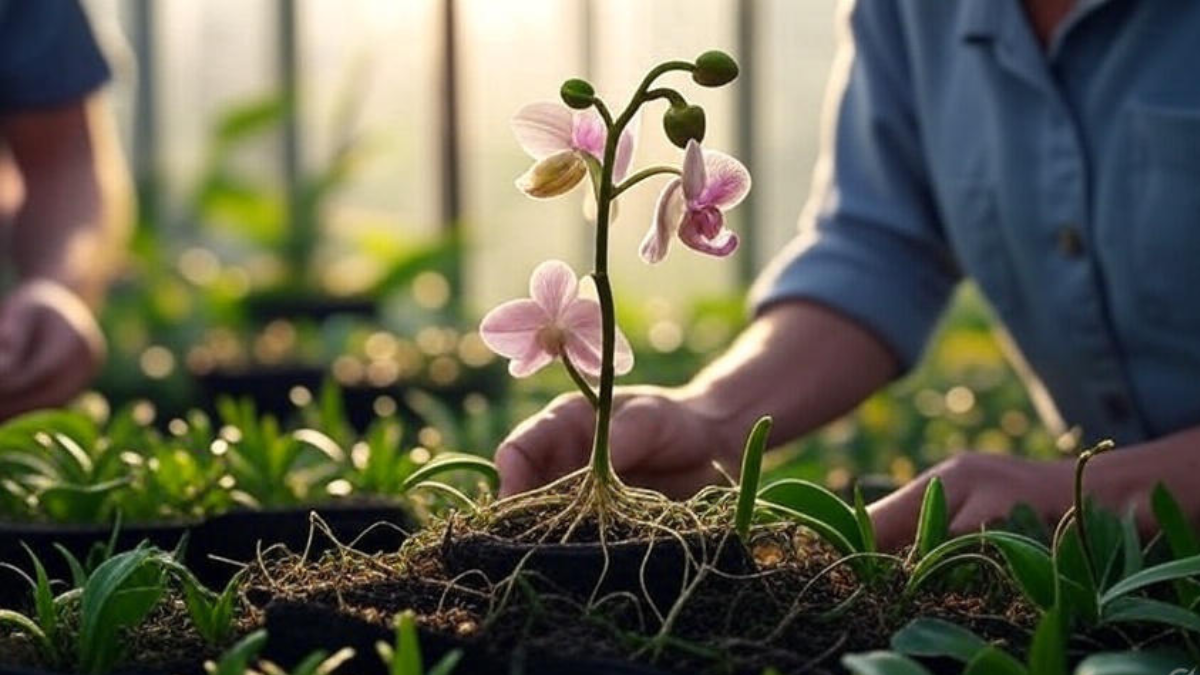
How to Transplant an Orchid – transplant is an important part of orchid care that keeps the plant healthy, helps it bloom better, and prevents root rot. Whether you’re growing Phalaenopsis, Dendrobium, or Cattleya, your orchid will eventually need a new pot and fresh growing medium. The best time to transplant an orchid is right after it finishes blooming, usually in spring or early summer. In this guide, I will share my personal experience with orchids and explain why, when, and how to transplant an orchid step by step, along with tips, benefits, and aftercare—written in a simple and helpful way.
I’ve been growing orchids in pots for several years now. In the beginning, I didn’t realize how important transplanting is. And I learning how to transplant orchids properly. Once I moved it to a fresh bark mix and a breathable pot, the plant came back stronger and bloomed the next season. Since then, I transplant all my orchids every 1–2 years, and it’s made a huge difference.
IN THIS ARTICLE
Why You Need to Transplant an Orchid
Orchids need transplanting when their roots start overcrowding the pot, the potting mix breaks down, or you notice signs like yellow leaves or rotting roots. Transplanting gives the roots fresh air, space, and better drainage, helping the plant stay healthy and bloom better.
Best Time to Transplant an Orchid
The ideal time to transplant an orchid is right after it has finished blooming. This is usually during early spring or early summer, depending on the type of orchid. Avoid transplanting when the orchid is in full bloom, as this can stress the plant and cause flowers to drop.
Quick Tips Before Transplanting Your Orchid
- Always transplant after flowering, not during bloom.
- Soak the orchid a day before transplanting to soften the roots.
- Use a clean, breathable orchid pot with drainage holes.
- Never use regular soil—only use orchid bark mix.
- Sterilize scissors before trimming roots to avoid infection.
- Don’t water the plant immediately after transplanting. Wait 2–3 days.
Step-by-Step Guide: How to Transplant an Orchid
Here is the complete method I follow to transplant my orchids at home.
Step 1: Prepare Your Tools and Potting Mix
- Use a transparent plastic pot or a clay orchid pot with holes at the bottom and sides for airflow.
- Get fresh orchid mix – usually a blend of bark chips, charcoal, and perlite. Avoid using garden soil.
- Sterilize your scissors or pruning shears using boiling water or rubbing alcohol to prevent infections.
- Keep gloves, a small stake (if needed), and labels ready.
Step 2: Water the Orchid a Day Before
- One day before transplanting, water the orchid thoroughly.
- Moist roots are more flexible and less likely to break during transplant.
- This also helps loosen the orchid from the old pot easily.
Step 3: Remove the Orchid from Its Pot
- Gently squeeze or tap the pot to loosen the plant.
- Hold the base of the plant and tilt the pot to slide it out slowly.
- If the roots are stuck to the pot walls, use a blunt stick or spoon to loosen them carefully.
- Never pull the orchid forcefully; it can damage the roots.
Step 4: Clean Off the Old Potting Medium
- Shake off the old potting mix from the roots.
- Rinse the roots under lukewarm water to clean them gently.
- Inspect the roots closely—healthy roots are white or green and firm.
- Trim off all black, mushy, or dried roots using clean scissors.
Step 5: Let the Orchid Air-Dry (Optional But Helpful)
- After trimming, let the orchid sit in a shaded area for 20–30 minutes.
- This helps small cuts dry and reduces the risk of fungal infection.
- During this time, you can prepare the new pot.
Step 6: Pot the Orchid in Fresh Medium
- Add a layer of orchid mix at the bottom of the new pot.
- Place the orchid so that the base of the stem sits at the pot’s surface level.
- Gently add bark mix around the roots, shaking the pot lightly to settle it in.
- Do not press the bark too tightly—airflow is important for orchid roots.
Step 7: Support the Orchid if Needed
- If the orchid wobbles or is top-heavy, use a thin wooden stake.
- Insert the stake into the pot and loosely tie the stem using soft twine or clips.
- This will keep the plant upright as it settles in.
Step 8: Wait Before Watering
- Do not water immediately after transplanting.
- Wait for 2–3 days to allow root wounds to heal.
- After that, resume your regular watering routine.
Benefits of Transplanting Orchids
Transplanting orchids improves their overall health and blooming ability. Fresh potting mix provides better airflow and drainage, which prevents root rot. Removing dead roots helps the plant focus on new growth. It also reduces the chances of bacterial or fungal infections. Orchids that are transplanted at the right time tend to bloom more consistently and grow stronger.
Aftercare Tips for a Transplanted Orchid
After transplanting, place the orchid in bright but indirect sunlight. Wait 2–3 days before watering. Avoid fertilizing for the first 2–3 weeks. Keep the orchid in a humid environment with good air circulation. If the plant looks droopy or slow to adjust, don’t worry – it may take a few weeks to recover fully. Monitor new root growth and leaf development as signs of a successful transplant.
FAQ- How to Transplant an Orchid
Can I repot my orchid when it is in bloom?
It is not recommended to repot an orchid while it is in bloom. Doing so can cause stress and lead to flower drop. The best time to repot is after the flowers fade and the blooming cycle ends. However, if the orchid is in distress due to root rot or poor potting mix, repotting may be necessary even during blooming – but do it very gently
What is an orchid repotting kit?
An orchid repotting kit usually includes everything you need to transplant your orchid safely. It often contains orchid bark mix, a breathable pot with holes, sterilized scissors or pruners, and sometimes clips or support stakes. These kits are helpful for beginners who want to avoid buying each item separately.
How to repot an orchid in water?
To repot an orchid in water, you’re actually switching to a water culture method. First, clean the roots thoroughly and remove all the old potting media. Trim off any dead or rotting roots. Then place the orchid in a clean glass container with just enough water to cover the root tips. Change the water every few days and monitor for root rot or mold. Not all orchids adapt well to this method, so observe closely.
Should I repot my orchid after buying?
If the orchid looks healthy and the potting media is firm and fresh, there’s no need to repot it immediately after buying. But if the potting mix is soggy, the roots are overcrowded, or the container has no drainage, it’s better to repot. Most store-bought orchids are grown in moss, which holds moisture for shipping but can lead to root rot if not replaced within a few weeks.
Conclusion
Transplanting an orchid might feel like a delicate task, but with the right steps and a little patience, it’s easy to do at home. I’ve saved many of my orchids by simply moving them into fresh bark mix at the right time. From better blooming to stronger roots, the benefits are worth it. Follow this step-by-step guide, give your plant the care it needs, and your orchid will reward you with beautiful flowers and healthy growth
Read more Post
How to Take Care of Orchids? (Beginner-Friendly Guide)
How to Grow Orchid Plant Without Soil at Home | Water Culture Gardening Guide