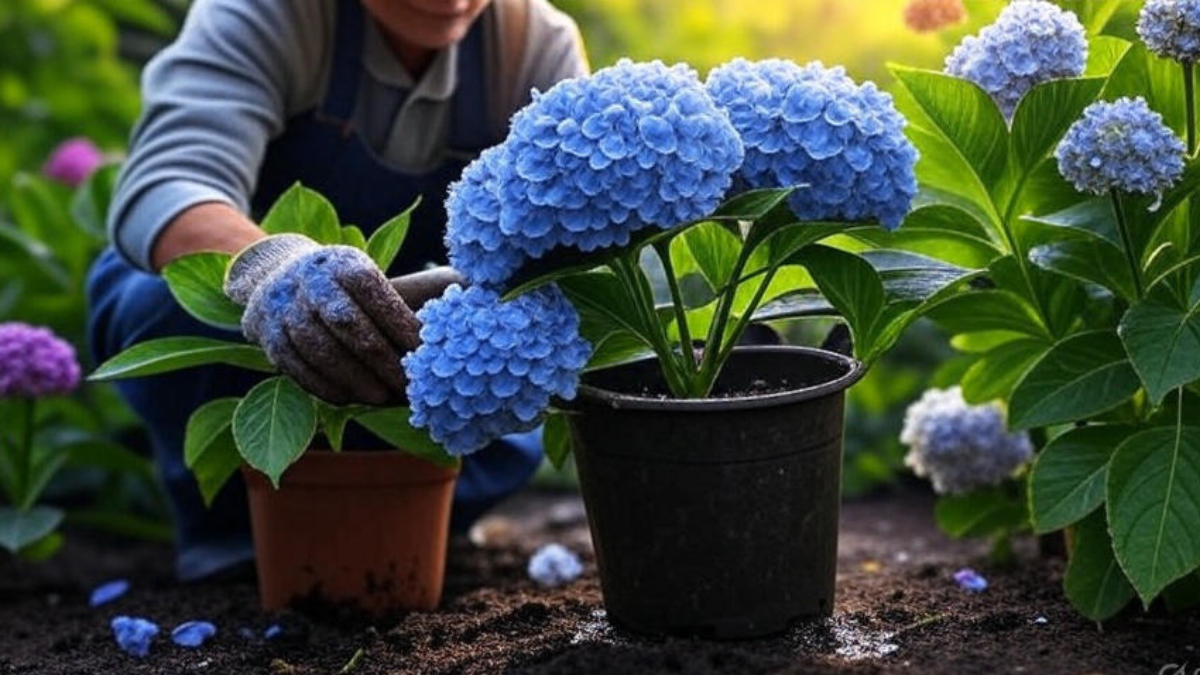
How to Transplant a Hydrangea– the process of moving it from one place to another—whether it’s from pot to ground, ground to another garden spot, or just to give it better sunlight, water, or space. The best time to transplant hydrangea is early spring or fall when the plant is dormant. With the right method, your plant won’t just survive—it will thrive.
I’ve been gardening for years, and I remember when one of my beautiful hydrangeas started struggling in the summer heat. It was planted in a spot with too much sun and poor soil. I waited for fall, prepared a new location with good shade and rich compost, and carefully transplanted it. Within a few months, the plant looked healthier, and by next season, it bloomed better than ever.
IN THIS ARTICLE
Why You Might Need to Transplant a Hydrangea
- The plant is not blooming well or the leaves are turning yellow.
- The current location is too hot, windy, or dry.
- The soil has poor drainage or low nutrients.
- You’re redesigning your garden or landscaping.
- The hydrangea has outgrown its current pot or bed.
A good transplant can give the plant a new start and help it thrive again.
Best Time to Transplant Hydrangeas
The timing plays a big role in transplant success. Hydrangeas should be transplanted:
- In early spring, before new growth begins.
- In fall, after the leaves drop and the plant enters dormancy.
Avoid summer when the plant is actively growing and can go into shock due to heat.
Quick Preparation Tips
Before you begin, keep these things in mind:
- Water the plant thoroughly a day before digging.
- Choose a cool, cloudy day—avoid full sun or windy weather.
- Dig the new hole first so the plant isn’t out of the soil too long.
- Use compost-rich soil in the new location.
- Prune off flowers or weak stems to reduce stress after transplant.
Step-by-Step Guide: How to Transplant a Hydrangea Properly
Step 1: Choose and Prepare the New Location
- Select a spot with morning sun and afternoon shade.
- Make sure the area has well-draining soil that stays moist.
- Dig a hole twice as wide and slightly deeper than the root ball.
- Mix garden soil with compost or aged manure to improve richness.
- Water the hole lightly so the soil is moist before placing the plant.
Step 2: Water the Hydrangea Before Digging
- One day before transplanting, water the plant deeply.
- This helps loosen the soil and keeps the root ball moist.
- A moist root ball reduces the chance of transplant shock.
Step 3: Carefully Dig Up the Hydrangea
- Using a spade, start digging in a wide circle (at least 10–12 inches) from the base of the plant.
- Dig deep enough to get the entire root ball—hydrangea roots spread wide more than deep.
- Gently lift the plant from the ground while keeping as much soil attached as possible.
Step 4: Transport the Plant to the New Spot
- Carry the plant carefully to the new hole. If it’s large, use a wheelbarrow or ask for help.
- Do not shake or break the root ball. Handle it gently.
Step 5: Place the Hydrangea in the New Hole
- Center the plant in the hole so that the top of the root ball is level with the ground.
- Spread out any tangled or circling roots gently with your hands.
- Backfill around the roots with the prepared soil-compost mix.
Step 6: Firm the Soil and Water Well
- Press the soil gently but firmly around the plant to remove air pockets.
- Make a small well or basin around the base of the plant to help water soak in.
- Water deeply to settle the plant into its new home.
Step 7: Apply Mulch Around the Base
- Add a 2–3 inch layer of mulch (dry leaves, bark, or wood chips) around the base.
- Keep the mulch 2 inches away from the stem to avoid rotting.
- Mulch helps maintain soil moisture and temperature.
Step 8: Light Pruning After Transplant
- If the hydrangea has many flowers or long stems, cut a few back to reduce water loss.
- Don’t prune heavily—especially if it’s a spring blooming variety.
Benefits of Transplanting Hydrangea
- Better root growth in fresh, nutrient-rich soil.
- Improved flowering due to proper light and space.
- Stronger stems and leaf health in a well-ventilated area.
- Protection from harsh sunlight or poor drainage.
- Revives stressed or weak plants that were not thriving.
Aftercare for Transplanted Hydrangeas
After transplanting, your hydrangea will need a little extra love for the next few weeks:
- Water regularly – Keep the soil evenly moist but avoid overwatering.
- Avoid fertilizers for 3–4 weeks – Give time to settle.
- If leaves droop or wilt, don’t panic – It’s a common temporary sign of stress.
- Protect from strong sun or wind for a few days.
- Remove weeds or grass growing near the plant base.
FAQ – How to Transplant a Hydrangeas
Can you transplant a hydrangea tree?
Yes, you can transplant a hydrangea tree. These trees, often Hydrangea paniculata trained into a tree form, can be moved just like shrub varieties. The best time to transplant a hydrangea tree is in early spring or fall when the plant is dormant. Be sure to dig a wide root ball, avoid damaging the roots, and water deeply after replanting to help it adjust.
Can I transplant a hydrangea in spring?
Yes, spring is a great time to transplant a hydrangea. Ideally, do it before new growth starts. The cool temperatures and moist soil during spring allow the roots to settle quickly and reduce the chances of transplant shock. Just make sure the plant is not actively blooming when you move it.
Can you transplant a hydrangea in the summer?
It’s possible to transplant a hydrangea in the summer, but it’s not recommended unless absolutely necessary. Summer heat can stress the plant. If you must transplant during summer, do it on a cloudy day, water thoroughly before and after moving, and provide shade for a few days after transplanting to protect it from direct sunlight.
How to transplant a hydrangea cutting?
To transplant a hydrangea cutting, make sure the cutting has developed strong roots. Wait at least 6 to 8 weeks after propagation. Choose a location with indirect sunlight and moist, well-draining soil. Transplant gently without disturbing the roots too much, and water well after planting. The best time to move a rooted cutting is spring or early fall.
When is a good time to transplant a hydrangea bush?
The best time to transplant a hydrangea bush is during early spring before new leaves appear or in fall after the leaves drop. These cooler seasons reduce transplant shock and give the roots enough time to settle before summer heat or winter frost.
Conclusion
Transplanting a hydrangea might seem like a big task, but with proper care and timing, it’s completely doable and highly rewarding. Based on my experience, a correctly timed transplant can completely revive a tired or unhappy hydrangea. Follow each step gently, give it a healthy environment, and your plant will soon reward you with lush green growth and beautiful blooms.
How to Propagate Hydrangeas – 3 Easy Methods (Water, Cutting, and Soil)