How to propagate Monstera in soil? Take a healthy Monstera stem cutting with at least one node, plant it 2 inches deep in moist, well-draining soil, and place it in bright, indirect sunlight. With regular care and the right soil mix, your cutting will develop roots within 3–4 weeks.
I’ve successfully propagated Monstera many times in soil at home. It’s one of the easiest indoor plants to grow if you follow the right steps. Below I’ll share my exact step-by-step process along with practical tips I’ve learned from my experience.
IN THIS ARTICLE
Quick Tips Before You Start
- Choose a healthy Monstera plant with strong stems.
- Use clean, sharp scissors or a blade to take the cutting.
- Always cut just below a node (where the leaf meets the stem).
- Include an aerial root if possible—this speeds up rooting.
- Use a light, airy, and well-draining soil mix.
- Don’t overwater—moist, not soggy, is key.
Step-by-Step Guide to Propagate Monstera in Soil
Step 1: Select a Healthy Stem Cutting
- Pick a healthy stem from your Monstera plant.
- Look for a part of the stem that has at least one node.
- It’s even better if the cutting has a small aerial root coming out.
- Cut just below the node, using a clean and sharp tool.
My Tip: I always pick cuttings that have one leaf and one node—it gives faster results and reduces stress on the plant.
Step 2: Prepare the Cutting
- Remove any leaves near the node (leave only 1–2 top leaves).
- If you have rooting hormone, dip the cut end for better root development (optional but helpful).
- Let the cutting rest for 30–60 minutes. This helps the cut end to callous over, reducing chances of rot.
My Tip: I usually place the cutting in open air for 1 hour before planting—this small step helps prevent fungal issues.
Step 3: Choose the Right Pot and Soil
- Use a small pot with drainage holes.
- Fill it with a well-draining soil mix. You can use:
- 50% cocopeat or peat moss
- 30% perlite or coarse sand
- 20% compost or vermicompost
My Tip: I always avoid heavy garden soil. Loose and light potting mix gives the best results for Monstera cuttings.
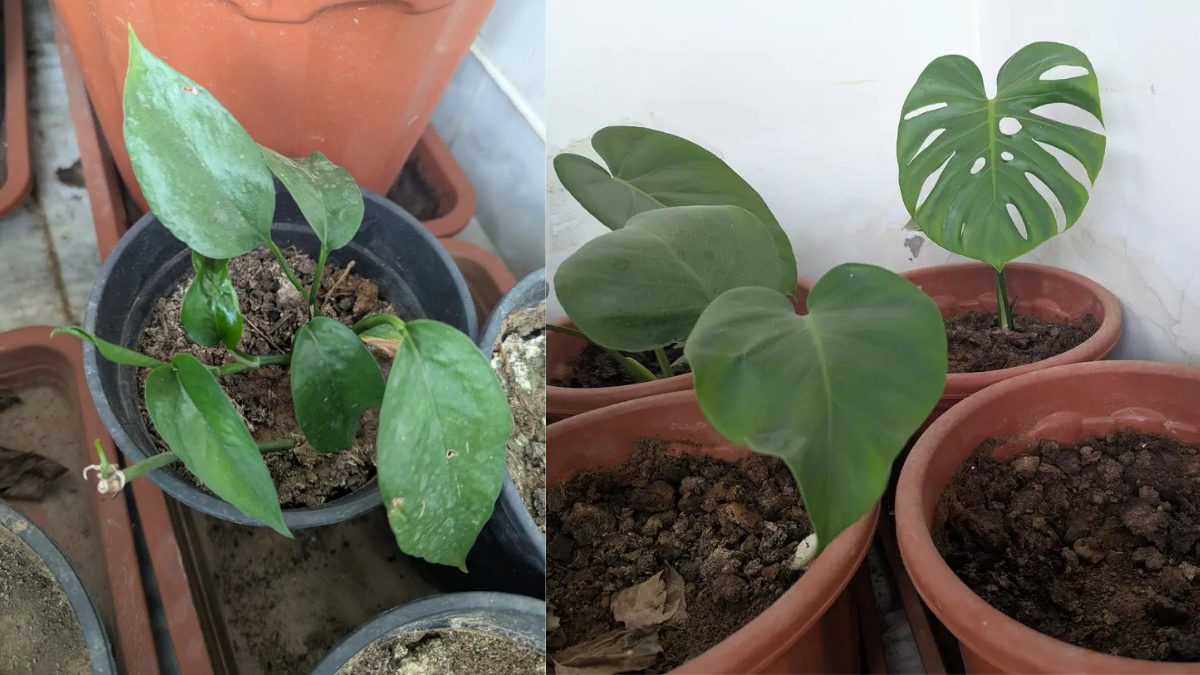
Step 4: Plant the Cutting in Soil
- Make a small hole in the center of the pot.
- Place the cutting gently, making sure the node is fully buried in the soil.
- Press the soil lightly around the base to hold the cutting upright.
My Tip: Don’t push the cutting too deep—about 2 inches is enough. If the cutting has an aerial root, keep it just at the soil line.
Step 5: Water Lightly
- After planting, give the soil a gentle watering.
- Make sure the soil is moist but not soggy.
- Let the extra water drain out from the bottom holes.
My Tip: I use a spray bottle or pour water slowly at the edges of the pot to avoid disturbing the fresh cutting.
Step 6: Provide the Right Environment
- Place the pot in a bright spot with indirect sunlight—no direct sun.
- Keep the pot in a warm area, ideally between 20–28°C (68–82°F).
- Avoid fans or AC drafts that can dry out the soil quickly.
My Tip: I keep my cuttings near a bright window with a sheer curtain. If your room is dry, mist lightly around the plant (not directly on leaves).
Step 7: Monitor Growth
- In 2–3 weeks, gently tug the cutting to check if it’s rooting.
- If you feel resistance, it means roots are forming.
- Around 4–6 weeks, new leaf growth will begin if everything goes well.
My Tip: Be patient. Some cuttings root quickly, others take longer. Avoid disturbing the cutting too often.
Step 8: Aftercare
Once roots are formed and the plant starts new growth:
- Water only when topsoil is dry (about 1–2 inches).
- Do not fertilize until the cutting has 2–3 new leaves.
- Once the roots fill the pot (after 2–3 months), repot in a larger pot.
My Tip: I wait 45 days before giving any liquid fertilizer and use only half-strength organic feed like seaweed or compost tea.
How to Care for Monstera Plant (Simple & Detailed Guide)
Signs of Successful Soil Propagation
- Stem stays firm and green
- Leaves look fresh (not droopy or yellow)
- New roots develop from the node area
- Eventually, new leaves start to emerge
Common Mistakes to Avoid
- Using a cutting without a node – It won’t root.
- Overwatering the soil – Leads to rot.
- Placing in direct sun – Burns the tender cutting.
- Using compact or heavy soil – Roots won’t breathe.
- Checking too often – Disturbs root formation.
Conclusion: How to Propagate Monstera in Soil
Propagating Monstera in soil is a simple and rewarding method if you follow the right steps. From my personal experience, the most important parts are using a node with an aerial root, a light and airy soil mix, and keeping patience. Within a few weeks, you’ll have a brand-new Monstera plant growing beautifully.
This method works great for indoor gardeners and is perfect if you want to grow multiple Monsteras or gift them to friends and family. Try it once, and you’ll feel the joy of growing your own green baby from scratch
Read More post