Bromeliad plant care indoors is easy with proper watering, sunlight, soil, and humidity. Learn from my personal experience how to grow healthy and colorful bromeliads at home.
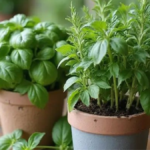
I have been growing bromeliads indoors for a few years now, and I can confidently say they are one of the most beautiful and easy-to-care-for indoor plants. Their bright colors and unique shapes can instantly brighten any room. In this post, I will share my personal experience and guide you step by step on how to care for bromeliads indoors, so you can enjoy healthy and vibrant plants.
IN THIS ARTICLE
What is a Bromeliad Plant?
Bromeliads are tropical plants originally from South America. They are popular as indoor plants because of their colorful foliage and low maintenance needs. One of the most interesting things about bromeliads is their “tank” formed by their leaves, which holds water. Bromeliads come in many varieties, and some of the most common indoor types are:
| Type | Features |
|---|---|
| Guzmania | Bright red, orange, or yellow flowers; grows in rosettes |
| Neoregelia | Colorful foliage; low flowers; compact size |
| Aechmea | Tall, spiky flowers; easy to care for |
| Vriesea | Feather-like flowers; bright indoor colors |
From my experience, Guzmania and Neoregelia are the easiest for beginners, as they adapt well to indoor conditions.
Quick Tips for Bromeliad Plant Care Indoors
Based on my personal experience, here are some quick tips to keep your bromeliads healthy indoors:
- Place your bromeliad in bright, indirect sunlight. Direct sun can burn the leaves.
- Water the central cup of the plant rather than just the soil.
- Use well-draining soil, such as orchid mix or cactus soil.
- Keep humidity above 40% if possible.
- Fertilize lightly once a month during the growing season.
These small steps make a huge difference in keeping bromeliads vibrant and long-lasting.
Watering Bromeliads Indoors
Watering is one of the most important parts of bromeliad care. From my experience, overwatering is a common mistake. Bromeliads store water in the central cup formed by their leaves. Here’s what I do:
- Fill the central cup with fresh water and change it every 1–2 weeks.
- Water the soil lightly, just enough to keep it slightly moist.
- Avoid letting the plant sit in water, as it can cause root rot.
- If possible, use rainwater or distilled water, especially if your tap water is hard.
Following this routine has always kept my bromeliads healthy and their leaves bright.
Soil for Indoor Bromeliads
Bromeliads don’t like heavy or compact soil. Good drainage is essential. In my experience, the best soil mixes are:
- Orchid bark with perlite – helps water drain quickly.
- Cactus or succulent mix – keeps the roots healthy.
- A mix of potting soil with sand or perlite works well too.
Always use a pot with drainage holes to prevent waterlogging. I once used a pot without holes, and the plant developed root rot in just a few weeks.
Sunlight for Bromeliads Indoors
Bromeliads love light, but not direct sunlight. From my experience:
- East or west-facing windows work best.
- Avoid placing them in direct afternoon sun, as it can burn the leaves.
- If natural light is low, use LED or fluorescent grow lights for 6–8 hours per day.
I have grown bromeliads under artificial light, and they still flower beautifully if they get enough brightness.
Humidity and Temperature
Bromeliads are tropical plants, so they prefer warm and humid environments. Based on my experience:
- Indoor temperature should be 60–80°F (16–27°C).
- Humidity should be 40–60%.
- If your home is dry, mist the leaves occasionally.
I keep a small humidifier near my indoor bromeliads during winter, and it helps them stay healthy.
Fertilizing Bromeliads
Bromeliads don’t need much fertilizer, but occasional feeding helps them grow and bloom. Here’s what I do:
- Use a balanced, water-soluble fertilizer at 1/4 strength once a month during spring and summer.
- Apply fertilizer to the central cup or lightly on the soil.
- Avoid over-fertilizing, as bromeliads are sensitive to excess nutrients.
After I started this routine, my bromeliads became more vibrant, and I noticed better flower development.
Propagating Bromeliads
One of the most fun parts of growing bromeliads is propagation. After flowering, they produce small offsets called “pups.” Here’s how I propagate them:
- Wait until the pup is at least 1/3 the size of the parent plant.
- Remove it gently with a clean knife.
- Plant it in well-draining soil.
- Water lightly and keep in bright indirect light.
Within a few months, the pups grow into full plants, giving you more beautiful bromeliads.
Common Problems and Solutions
| Problem | Cause | Solution |
|---|---|---|
| Browning leaves | Low humidity or too much sun | Increase humidity, move to indirect light |
| Root rot | Overwatering or poor drainage | Remove affected roots, repot in fresh soil |
| No flowering | Low light or lack of nutrients | Provide more light, fertilize lightly |
These issues are easy to manage if you observe the plant regularly.
Conclusion
Growing bromeliads indoors is simple and rewarding if you follow a few basic care steps. From my personal experience, the key is moderate watering, bright indirect light, well-draining soil, and proper humidity. With patience and care, your bromeliads will flourish, add color to your home, and bring a touch of tropical beauty indoors.