How to propagate polka dot plant from stem cuttings? The best way is to take a healthy stem, cut it just below the node, and root it in either water or soil. Within 2–3 weeks, new roots will form, and you can grow a fresh polka dot plant easily at home.
I am sharing this post based on my own gardening experience. I have been growing indoor and outdoor plants for years, and the Polka Dot Plant (Hypoestes phyllostachya) is one of the easiest plants I have propagated. Many times I tried different methods, but stem cutting worked best for me. It is simple, quick, and gives good results if done in the right way.
IN THIS ARTICLE
About Polka Dot Plant
The polka dot plant is a small, colorful foliage plant known for its attractive spotted leaves. It is mostly grown as a houseplant but also works well in gardens and terrariums. Because of its small size and bright colors, many gardeners like to grow multiple plants together.
Propagation is important because polka dot plants do not live for many years. After a season or two, they can become leggy or weak. By using stem cuttings, you can always create new plants and keep your collection fresh and bushy.
Why Choose Stem Cuttings for Propagation?
From my experience, stem cuttings are:
- Fast – roots form within 1–3 weeks.
- Simple – you don’t need special tools.
- Reliable – higher success rate compared to seeds.
- Economical – one mother plant can give you many new plants.
This is the method I always recommend to beginners.
Step-by-Step Guide to Propagate Polka Dot Plant from Stem Cuttings
Step 1: Select a Healthy Stem
First, look at your polka dot plant and choose a fresh, green stem. Make sure the stem is not too old or woody and also not flowering. A good length is about 5–8 cm (2–3 inches).
When I do propagation, I always pick stems that look strong and have at least 4–6 leaves. This gives better chances for rooting.
Step 2: Make the Cutting
Take a sharp, clean pair of scissors or pruning shears. Always clean your tool first because dirty tools can cause infection. Cut the stem just below a leaf node.
The node is a small bump on the stem where leaves grow. This is the place where new roots will come out. Cutting below the node makes sure the plant has more rooting power.
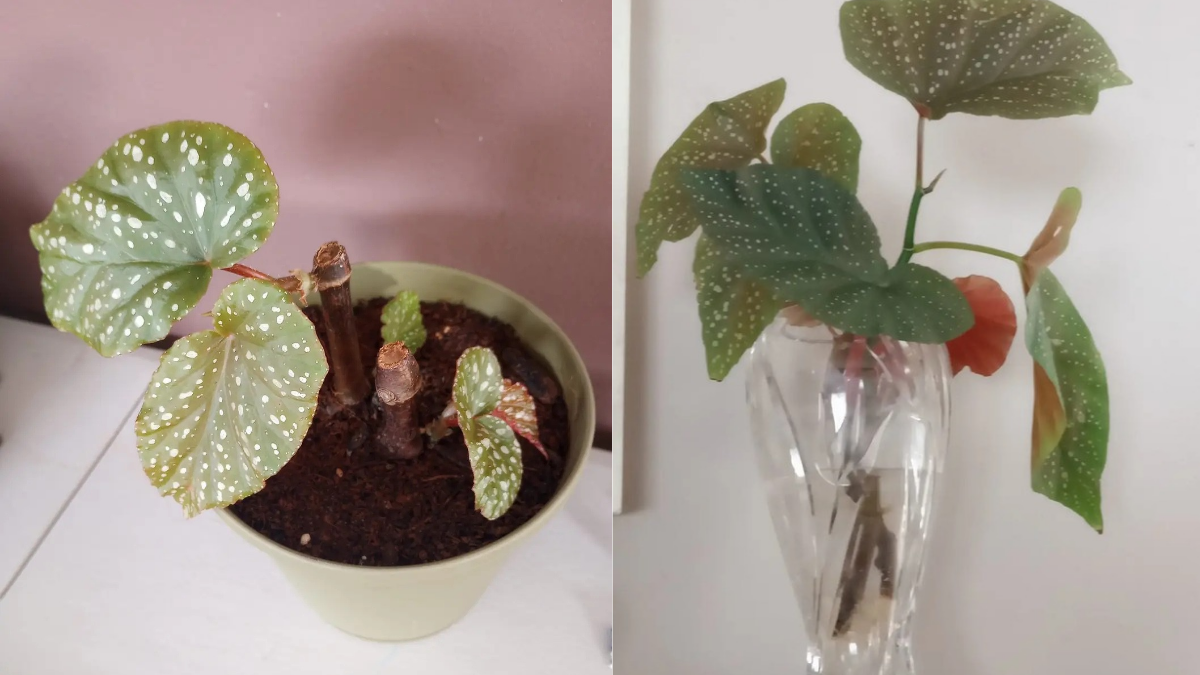
Step 3: Prepare the Cutting
After cutting, remove the lower 2–3 leaves from the stem. Keep only the top leaves. This helps the plant focus on making roots instead of supporting too many leaves.
When I started gardening, I made the mistake of keeping all the leaves. The cutting dried quickly. Later I learned that keeping fewer leaves helps the plant grow roots faster.
Step 4: Rooting the Cutting
Now you have two simple options – water rooting or soil rooting.
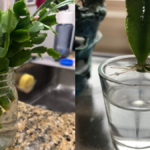
(a) Water Rooting
- Take a clean glass or jar and fill it with fresh water.
- Put the cutting in the jar so that the node (without leaves) is under water. The leaves should stay above water.
- Keep the jar in bright but indirect light. Never place it in direct sunlight because that will burn the leaves.
- Change the water every 3–5 days. Clean water prevents rotting.
- Within 7–14 days, you will see white roots growing from the node.
I love this method because you can see the roots growing, and it feels exciting every day to watch the progress.
(b) Soil Rooting
- Take a small pot and fill it with a light potting mix (I use cocopeat and perlite mix).
- Make a hole in the soil with a pencil or finger.
- Insert the cutting into the hole so that the node is inside the soil.
- Press the soil gently and water lightly.
- Cover the pot with a plastic bag or plastic cup to keep humidity.
- Place the pot in bright, indirect light.
- In about 2–3 weeks, roots will form. You can check by gently pulling the stem. If it resists, it has rooted.
Both methods work well, but from my experience, water rooting is easier for beginners. Once roots grow, you can shift them into soil.
Step 5: Transplant the Cutting
When the roots are 1–2 cm long in water, or when the cutting is stable in soil, it is ready to move into a small pot.
- Use a fresh potting mix with good drainage.
- Plant the cutting carefully without damaging roots.
- Water lightly after transplanting.
I always keep the new plant in a shaded place for a few days so it can adjust before moving it to normal light conditions.
Tips for Successful Propagation
- Always cut just below a node.
- Use young, healthy stems instead of old woody ones.
- Keep the soil moist but not soggy. Overwatering can cause rot.
- Maintain bright, indirect light.
- Pinch the tips after some growth to make the plant bushier.
- Plant 2–3 cuttings together in one pot for a fuller look.
My Personal Experience
I have propagated polka dot plants many times. At first, I faced problems like stem rotting in water or leaves turning yellow. But after practice, I realized the importance of clean tools, changing water on time, and keeping the plant away from direct sun.
Once I even made a full pot by placing 4 cuttings together. In just one month, it became a bushy and colorful plant, and many people asked me how I grew it so fast. That’s why I always recommend stem cuttings to new gardeners — it’s simple, cheap, and satisfying.
FAQ – How to Propagate Polka Dot Plant
Can I propagate polka dot plant from a single leaf?
No, a single leaf usually does not grow roots. You need at least one stem with a node.
How long does it take for roots to grow?
In water, roots appear in 7–14 days. In soil, it takes 2–3 weeks.
Should I use rooting hormone?
It is optional. The plant roots easily even without hormone.
Can I propagate polka dot plant in winter?
Yes, but it will be slower. Best results come in spring and summer.
How many cuttings should I plant in one pot?
For a fuller look, 2–4 cuttings per pot works best.
Conclusion
Propagating polka dot plant from stem cuttings is the easiest way to grow new plants. With just a few simple steps — choosing a healthy stem, cutting below a node, rooting in water or soil, and transplanting — you can enjoy fresh, colorful plants at home. From my experience, this method is quick, reliable, and gives beautiful results. If you care properly, your small cutting will turn into a bushy plant within weeks.